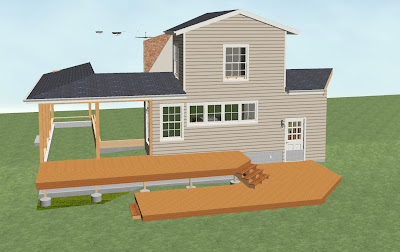
When doing a room addition design, I like to show the framing of the new addition, sitting with the existing home. This is not a critical part of the Construction Drawings (CD's), but it really gives them some "Flair" if you know what I mean. After all, I don't consider my CD's for a new home or remodel project "a simple or basic blueprint". I like to produce a set of drawings that uses all of Chief Architect's 2D & 3D capabilities, to not just show the plan, but show it in a creative & attractive way:
Creating this view is not that easy, if you don't know how. There are a couple of ways to do it, but I just discovered a new, fairly quick way. The method I had used in the past, was using custom layers & layersets, but I found it was very slow. My new method uses symbols, and shaves some time off.
Step one:
Of course, is to draw the existing home, and name the file "Jones As-Built":
The next step involves creating a couple of new plans by doing a "save-as". Take this finished plan and do a "File>Save As" and change the file name to "Jones room addition without house". Next step is to auto-build all the framing in the house. At this point you can start deleting all portions of the old house, so nothing is left except the new addition:

Next, take a 3D Framing Overview, and turn off the terrain and deck planking:
Here is where the magic happens; From this view, you can go to the upper toolbar, and click on "Tools>Symbols>Convert To Symbol". This will turn everything that's showing in the view into a symbol. You can check "Add to Library" if you like, but it's not necessary.
Next, go back to your "As-Built" plan, and while in floor plan view, go to the upper toolbar, click on "Tools>Symbol>Get Last Symbol", and click in the plan. This will place the symbol in your plan. Now all you have to do is to adjust the height & location, by "Ctrl" dragging it into place, and you're done:


