Let me start off by saying that I am not an expert in lighting, but with the help of some of the Chief Peeps, I have at least been able to get a working knowledge of how to get lighting set up for interior raytraces, in Chief’s new raytrace engine. The purpose of this article is to enable you to get a really nice raytrace, in under 10 minutes. There is a lot more involved in getting a stunning raytrace, but that’s also something you can accomplish in Chief, with some effort.
First thing you want to make sure of, is that all the lights in your model are turned off! Do this by going into “3D>Lighting>Adjust Lights”. Select the first light, scroll down to the last light, hold your shift key and click on the last light. This will “Group Select” all the lights at once. Then just click on the check mark in the box of any light fixture, and this will turn them all off at once. When you set up your raytrace, you will turn on just the lights in your scene. The reason for this (I learned the hard way) is if you have 165 lights on in your model, a “Quick” raytrace might take 7 hours, and if you only have 6-8 lights on, it will drop down to 5-6 minutes. Chief’s new raytracer will not be drastically slowed down by a complicated model, but it will be drastically slowed down by too many lights, even if they are on a different floor.
Before we adjust the light type, you should open your light fixture, go to the Material tab, select “Bulb”, click on “Plan Material”, select “Lighting, White”. Next, click on “Edit”, go to the “Properties” tab, Under “Material Class”, make sure “General Material” is selected, and move the slider for “Emmisive” all the way up to 100%. This will make the bulb on the light look like it is ‘glowing’ in a raytrace view, and look more like an actual light.

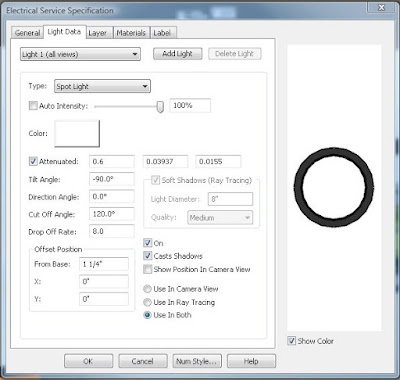
Next, some info about light source types. When a light fixture is placed in a plan from the library, it does not necessarily have the best settings for an interior raytrace, but so far, I have noticed they are set up to get a pretty good scene for renders. Any light you get from the library can be set to 1 of 3 different types of light source, regardless of what kind of fixture it is. This information can be found and adjusted by selecting a light fixture, either in plan view or 3D view, open the item, then go to the “Light Data” tab in the Dialog Box.
Chief has
3 types of light sources;
• Point light
• Parallel Light
• Spot Light
Point lights give a pretty even spread of light in every direction. They are the best type of light to light up a room in a render view, but I don’t like them at all in a raytrace view, because they give a big bright spot on the ceiling all around the fixture, like the light was shining back up towards the ceiling.
A
Parallel light won't do you any good inside (aside from through openings). Parallel lights are infinitely far away. So, I won’t choose a parallel for an interior raytrace.
Spot lights seems to work the best for interior raytraces, but they require some adjustments.

Of course the first thing you want to do is to hit the drop down on “Type”, and select Spot Light. Next, Un-Check “Auto Intensity”, and move the slider up to 100%. This might be too high in certain scenes, and if so, you can back it off to around 80%.
The next item to adjust is the
“Cut-Off Angle”. A Cut-Off Angle of 5º will give a narrow beam of light straight down to the floor. A Cut Off Angle of 60º will give a much wider beam of light, more like a real spotlight:


So far, for interior raytraces, I prefer to set the Cut Off Angle at 120º.
The next item we want to look at is the
“Drop Off Rate”.Quote: Dermot Dempsey
“The Drop Off rate for a spot light controls how quickly the light drops off from the center of the cone to the outer edges of the cone.
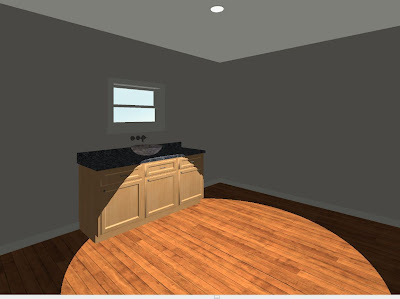
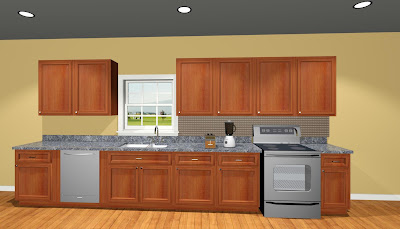
Try experimenting with the values to see the effect. Place a single spot light in a room pointing down and leave the cut off angle at 60 degrees. A drop off of 7.5 means the light will drop off fairly quickly as it gets to the outer edge of the cone. Try setting it at 0 and you will see the same light at the outer edge as you do at the center. This will look more like the kind of spot light used in theater then in houses. Chances are that you will get the best effects with something greater then 0 but less then the 7.5 default.” Here’s my explanation: In the pictures below, the first picture has the Drop Off Rate set at zero. This means that at the outer edge of the circle of light coming from this fixture, it has a clear (harsh) edge like a flashlight in the dark with a concentrated beam:

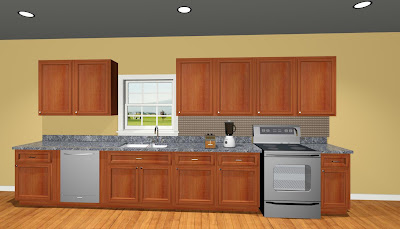
This next picture has the Drop Off Rate set at 2.0. This gives a much softer edge, but still allows you to see that the light is actually giving light to the scene, and a much more realistic look.

This third picture has the Drop Off Rate set to 6, which I think is too much, because the edge definition of the light is completely gone, so you don't get a feeling that these lights are real:

So, in this particular case, I like the Drop Off Rate set to 2.0.
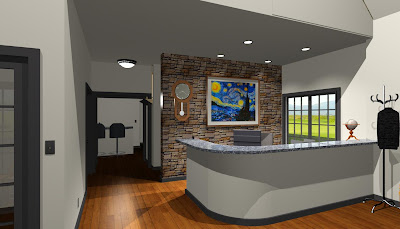
This is not always the case, in some scenes, you will need to bump the Drop Off Rate all the way up to 10 or more to get soft edges with the lights. Here’s an example; In this office scene, The first picture has spots set with a Drop Off Rate of 2, and the edges on the light beams is too harsh. The second picture has the Drop Off Rate set at 8, and it looks much better:


However, this scene is also affected by the amount of light coming from the other fixtures & light sources. When you have additional light sources in the room, the edges of those spot light ‘beams’ get washed out a little bit, so you have to keep that in mind; if your edges are too sharp, and raising the Drop Off Rate doesn’t get it where you want it, you may need to add additional light sources.
Which brings me to my next subject:
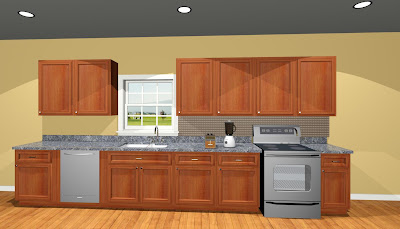
Added Light Sources.So far, I have found that in most cases, the lights I put in a model are not enough to properly light the scene enough for a good raytrace. When that’s the case, go to floor plan, go to “3D>Lighting>Add Lights” In a decent size kitchen, I will add 4 “Light Sources”, lined up behind the camera, across the room. I try not to put these in front of the camera, so that the light fixtures I have in the scene look like they are supplying the light for the room. I make these light sources point lights, uncheck “Auto Intensity”, and put the Intensity slider up to 75%. I also un-check “Casts Shadows” with my added Light Sources. The reason for this is I want my light fixtures to create the shadows for the scene, and I don’t want the extra light sources creating a whole bunch of extra shadows, making you wonder where their coming from. Again, the brighter these Light Sources are, the more they wash out or tone down the edges of the spot lights you are using.
Raytrace Settings:When you are setting up your lighting, before you start a raytrace, start the raytrace wizard, and in the first window, select “Indoor”, and “Quick”. Click next, and put a check mark next to “Use Active Window Size”. You can get a faster raytrace by keeping the default 640 x 480 pixels, but in most cases, even with my 22” monitor and settings of 1485 x 852 pixels, the Indoor, Quick will finish anywhere from 50 seconds to 2 minutes.
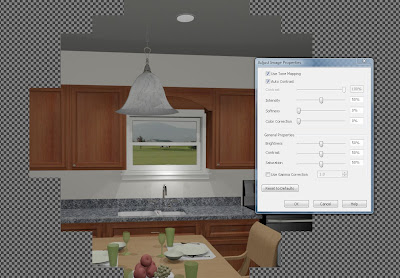
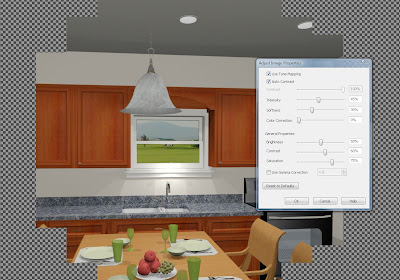
The next thing to know, is a great new tool called the “Adjust Image Properties” tool. This tool works similar to a photo editing software, so you can adjust the raytrace after it’s complete. And, actually, you don’t have to wait until the raytrace is completed to start adjusting it. You can click the tool and make adjustments as it’s processing. If you get it looking like you want it and click OK, you can still go back later and reset it to defaults, if you like.
This picture below is a screen capture of the default settings:

This next picture is of my preferred settings:

I like to leave the Brightness at 50%, move the Contrast up to 60 to 65%, and move the Saturation up to 70-75%. Make these adjustments first. Next, you might consider moving the Intensity down to 40-45%, and the softness up to around 30%. This finished raytrace took under 3 minutes:
Once you get your lighting right, you can then start experimenting with higher quality settings. However, make sure you have time, or you can set it to process overnight. If you are letting it go overnight, consider setting up multiple raytraces. Once you get one going, go back to your render camera, click Raytrace Current View, and start another one, with different settings. They will not raytrace at the same time, but once the first one is done processing, the next one will start. I have had 5 raytraces lined up at a time, and I don’t know if there is a limit.
One other thing to keep in mind, is the “Estimated Time Remaining” when a raytrace starts is not accurate. I have often found that number is initially about 10 times longer than it actually takes.
